
QuickBooks is perhaps one of the most widely used accounting software programs by companies all over the world. Like any other software, sometimes it goes wrong. Amongst the most common errors, the customer faces error codes H202 and 505 generally occur due to issues related to the database or the multi-user mode the customer cannot reach.
We will go over the meaning of these mistakes, their causes, symptoms, and thorough fixes in this extensive guide to assist you in fixing QuickBooks Desktop errors H202 and H505.
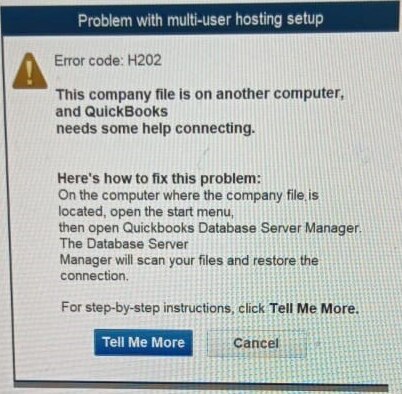
Understanding Error H202
The H505 error will occur when users attempt file or data transfer to another system that is not properly configured for hosting or needs extra setup steps. All H series errors originate from improper setup of hosting capabilities. The error code displays itself on the computer screen when any of the user’s selected computers function as the QuickBooks server system. Only the server meets official runtime specifications as a host because the correct Word configuration capability exists within the system hosting company files.
Reasons and Symptoms of QuickBooks H202 Error
Reasons
QuickBooks error H202 can occur for several reasons, including:
- Incorrect parameters for the hosting configuration.
- Prevented QuickBooks and the server from communicating.
- DNS settings that are damaged or wrong.
- There is no operating QuickBooks Database Server Manager.
- Firewall settings prevent access to the server by QuickBooks files.
- A corrupted Network Data (.ND) file is present.
Symptoms
Users encounter these symptoms during their use of QuickBooks:
- Users experience heavy program slowness and random freezing during QuickBooks operation.
- Users encounter Error Code H202 when QuickBooks attempts file connection to access the company data but fails to communicate with the server.
- The system prevents users from changing to multi-user mode.
- The remote server prevents the user from accessing the company file.
How to Resolve Error H202 in QuickBooks Desktop
Use these detailed instructions to resolve QuickBooks error H202.
Step 1: Use QuickBooks File Doctor
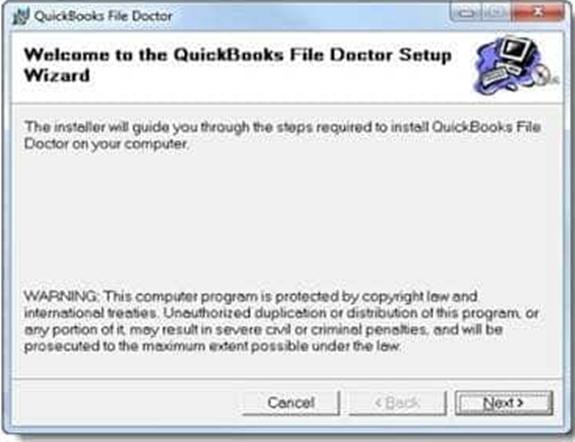
Start by downloading and executing the QuickBooks File Doctor software on your server system. The utility performs automatic deletion of all H – series and multi-user errors. Continue with the procedure of solution 2 if the QuickBooks Error Code H505 remains active.
- You need to start the process of acquiring the QuickBooks tool hub program through the official Intuit website
- Save the downloaded file to the computer then follow the screen instructions to perform the installation.
- Use the double-click action to open the new tool hub icon after the download process to start the tool.
- The user needs to verify that the QuickBooks Desktop is present on the server system along with network accessibility
- The tools hub screen requires users to first open it before they can click on the company file issues tab.
- The user should select Run QuickBooks file doctor from the available screen options.
- Choose the company file that you want to diagnose and repair
Note: Users have the option to obtain the QuickBooks file doctor tool directly and operate it from the server system. The file doctor tool solves multi user issues and thus resolves all H series errors entirely.Step 2: Verify services & hosting
The first requirement for you is to validate all services.
Here’s how
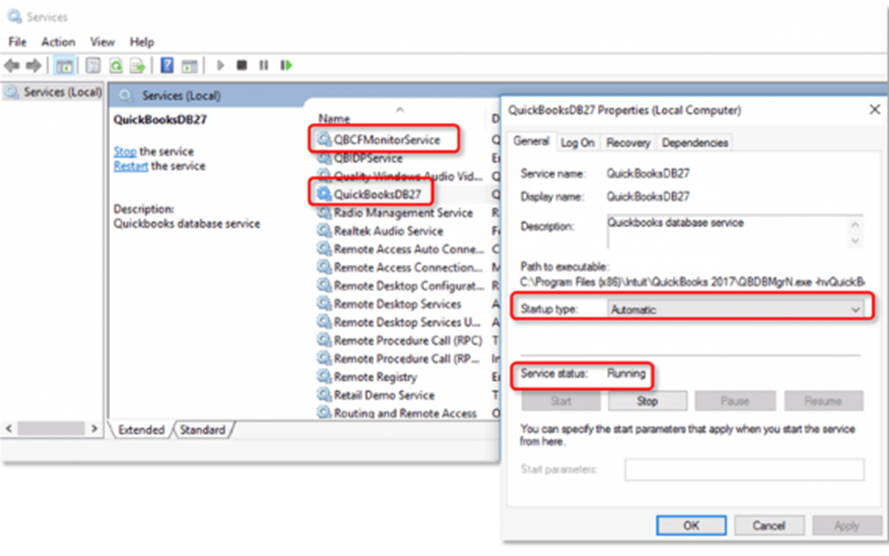
- To start utilizing services make sure that both QBCFMonitor and QuickBooksDBXX services are enabled.
- Click on the “Windows” button or the “Start” button
- Insert the key “Window+R” keys
- Open the run box then enter “MSC” followed by pressing the “Enter” tab.
- The “QuickBooksDBXX service” can be located in the service window.
- The QuickBooksDBXX service does not show up in the visible list.
- Ensure that the QuickBooks Database Server Manager software exists on this server system
- Start QuickBooks from the server if the user operates the full program from this machine. The hosting status should be verified to ensure its activation before concluding this process.
- Check that “QuickBooksDBXX” service both startup type and service status has started after opening it.
- Hit the “Recovery” tab
- Save the changes
Verify Hosting Settings
- Open QuickBooks on all workstations.
- Go to File > Utilities.
- When you see “Host Multi-User Access” select it at any time since the server already enables this feature.
- The “Stop Hosting Multi-User Access” option allows you to disable the feature. Click it to proceed with the disablement.
- Testing the error requires restarting QuickBooks followed by a verification of the error status.
Step 3: Editing the host file
- To begin opening the “Run window” users need to press the keys “Windows + R” simultaneously.
- Using the Windows + R keys users can launch the Run window before entering cmd and clicking Enter to activate the Command Prompt window.
- The process continues with entering “ipconfig/all” into the command line followed by pressing Enter
- The final phase of this operation requires users to note down the “Hostname and IP Address” information. The user needs to execute this procedure again on every system with multiple user setups.
The modification of the Windows Hosts file follows this step.
- Users should begin by closing down QuickBooks after which they need to navigate to the Start Menu.
- From that point access “C:\Windows \ System32 \ Drivers\ Etc or C:\Windows \ Syswow64\ Drivers\Etc“ inside “This PC”.
- Moving on to hidden files and folders should be done when the Windows directory cannot be located through This PC.
- Users must select the “View tab” and activate “Hidden items” from the list of options. When the user applies the view tab setting their hidden files will become viewable.
- The user should perform a right-click action on the host file before selecting “Open” and opening it using Notepad.
- Filling in the IP Address and Computer Name completes the next step of the process. Through the Tab key users can enter their input details since the spacebar cannot separate the IP address from the system name properly.
- The user needs to save changes and reopen QuickBooks in multi-user mode as the last step.

Step 4: Make the corporate file accessible by creating a new folder for it.
- Users must build a fresh folder inside the hosting machine.
- Windows users must have file entry permissions and then authorize access to the company file.
- The qbw file requires placement in the new folder after creation.
- The completion demands users to enter multi-user mode and open the company file.
Step 5: Evaluate all available services on the server system
- The beginning procedure requires users to access the server system Windows tab and start the menu
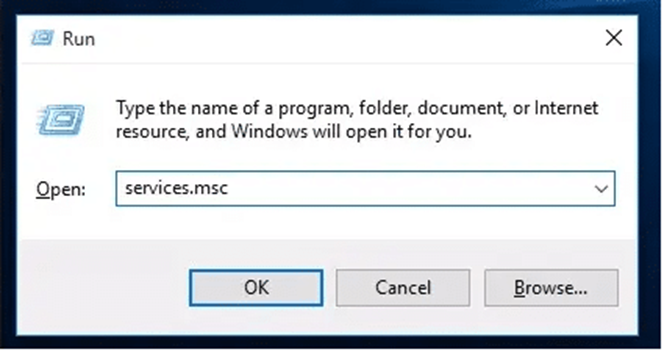
- The user should open the run tab by entering run in the system interface.
- The next action requires entering services.msc into the run tab followed by hitting the enter key
- Double-click the QuickBooks DBXX
- The user should choose automatically during the start-up type selection process.
- Users must confirm that the service operates either from the running or started condition
- Select the start tab then hit the recovery tab
- Start the service by choosing options from first failure to second failure and subsequent failure in these three drop-down menus.
- Select the Apply tab followed by clicking the ok tab to save the modifications
- The ending process requires users to perform the procedures again for QBCFMonitorService.
Read More: Fix QBCFMonitorService Not Running
Step 6: Configure firewall port settings
The following procedure will help you set up firewall ports for QuickBooks:
- First users need to access the run box through the Windows +R keys.
- Access the control panel by running an appropriate command.
- You should enter the command into the run box and activate the enter button
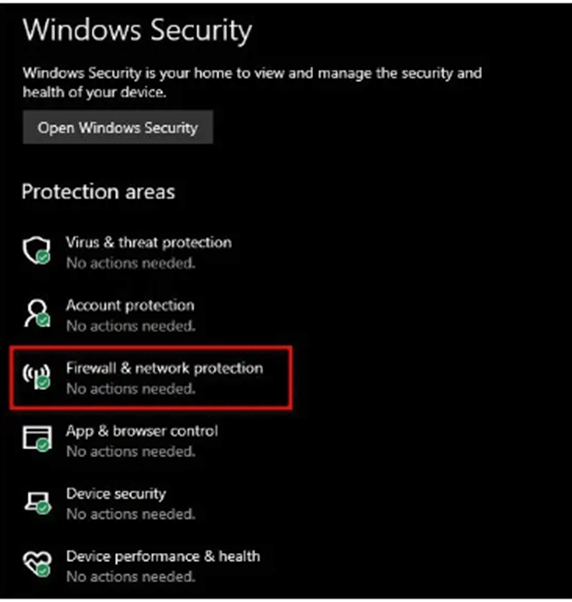
- Navigate to the System and Security settings after finishing the last step in the Control Panel
- Network protection along with the Windows firewall should also be opened.
- At this stage use the mouse to select advanced settings while choosing the inbound rule through the user interface.
- At this point, the user needs to choose from a set of available new rules to proceed.
- Choose the port then proceed to the following tab by clicking on it.
- Verify that the selected TCP matches the TCP option
- To proceed ahead you must select the year version port of the QuickBooks desktop application.
- The user should enter the Year Code in the specified field before continuing to the next tab and restarting the software.
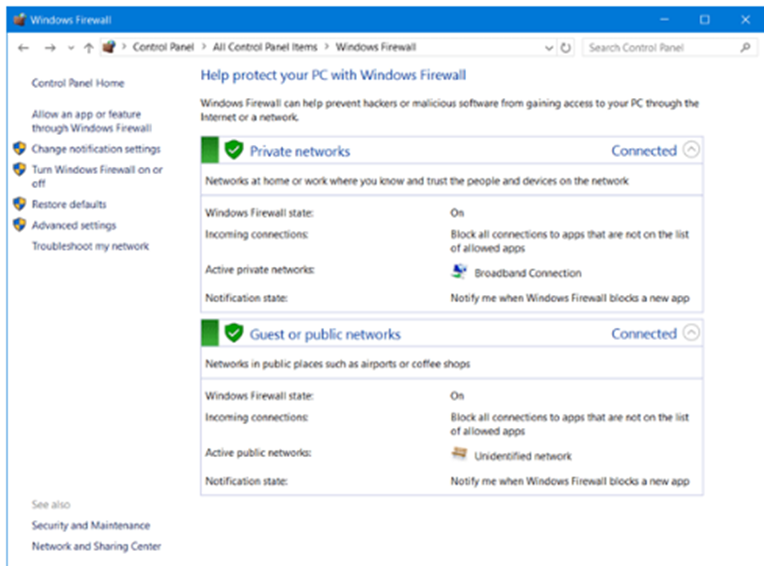
Step 7: Configure Windows Firewall Settings
- Navigate to the Control Panel to view Windows Firewall through its interface.
- Under Advanced Settings if you select Inbound Rules next you can proceed.
- Regular users should establish a new rule through Windows Firewall to permit QuickBooks executable files (QBDBMgrN.exe, QBCFMonitorService.exe, QuickBooksDBxx.exe).
- Implement the configured settings by allowing the connection.
- The procedure must be repeated for Outbound Rules.
- After restarting QuickBooks you should verify whether the problem has been resolved.
Read More: Fix QBDBMgrN Not Running
Step 8: Run the QuickBooks database server manager
The QuickBooks database server manager allows users to proceed with this process through the QuickBooks tool hub by following these enumerated steps.
Install and download the QuickBooks tool hub application directly on the server system.
- The initial step is to close QuickBooks.
- Execute the download of the QuickBooks tool hub program
- You should select a place to save the file which is easy to remember.
- The QuickBookstoolhub.exe application that you saved previously needs to be opened now.
- Read the screen instructions to install the program and follow through with the terms and conditions of acceptance.
- Following installation completion, the user must open the tool hub program by double-clicking its icon on the Windows desktop
- Users should look up QuickBooks tool hub through Windows search when the icon is not visible to find and select the program.
- Users must access the QuickBooks database server manager through the tool hub program
- The QuickBooks tool hub includes the network issues tab which users must select.
- Users must run the QuickBooks database server manager via the tool hub program before choosing QuickBooks database server manager. The prompt will guide the installation of QuickBooks software when it is not present on the server.
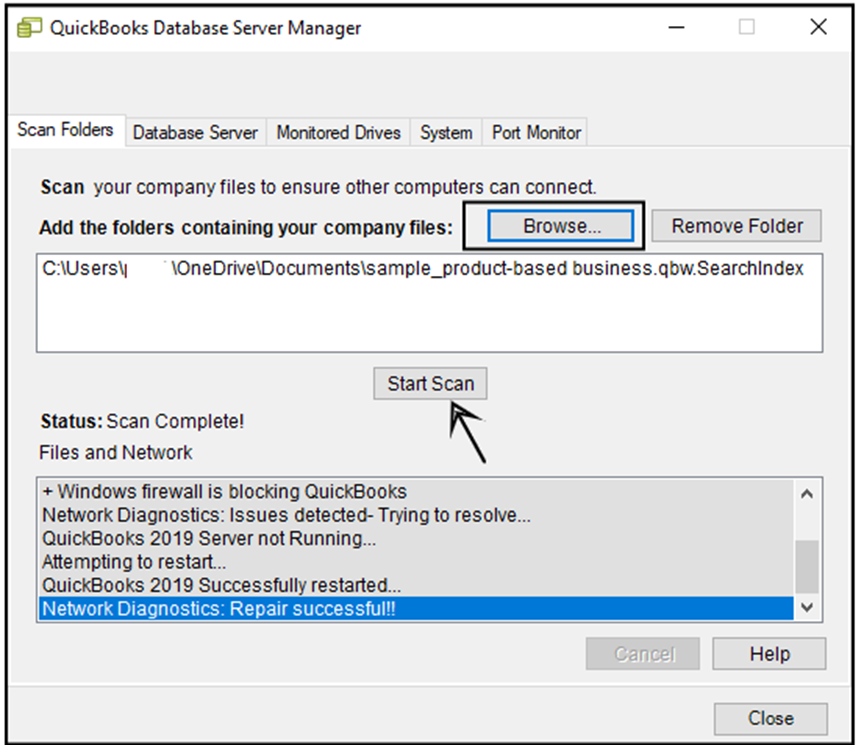
- Touch start scan from the menu if your company file directory exists. You should start scanning from the company file location if the files are not accessible.
- The database server manager automatically resolves firewall permissions during its current operation. Close the scanning process when it concludes.
- The solution ends by opening QuickBooks on each workstation showing symptoms. Select the file option and follow up by choosing multi-user mode. Check the server system as a workstation if the user identifies it.
Step 9: Follow the instructions when hosting the company files
Host own network
Users should install the database server manager on the server for each version of QuickBooks being used when this manager is not present in the system. The server system functions as the company files hosting location. After the installation of the database server manager, the user is ready to execute the following actions.
- Users need to install both the entire QuickBooks desktop applied with the database server manager on the server system in the full program method.
- With the server-only approach, you should place the database server manager program on your server computer system.
Hosting the network with Windows Server 2012 Essentials R2
The user needs to do the following for hosting the network with the use of Windows Server 2012 Essentials R2.
- Use QuickBooks enterprise hosting – If the users are using QuickBooks enterprise hosting, then reaching out to professionals is suggested.
- Use another hosting solution – If the user is making use of another solution, then directly contact the hosting provider to restart the hosting environment.
How to Resolve Error H505 in QuickBooks Desktop
Users encounter QuickBooks error 505 because the application cannot access the database which happens because of permission problems or incorrect installation and problems with third-party applications. Database connectivity problems together with server-related matters cause this error to manifest.
Step 1: Restarting of QuickBooks Database Server Manager
- The services.msc window can be accessed by Windows + R after entering services.msc and hitting Enter.
- On the list click on QuickBooksDBxx; the specific version replacement will be here.
- Right-click and click Restart.
- In the Startup Type, select Automatic.
- Check in the Opened QuickBooks application for the solution to the error.
Step 2: Repair QuickBooks Database Server Manager
- Open Control Panel > Programs and Features.
- Use the Control Panel to open Programs and Features and then select QuickBooks Database Server Manager and proceed with the Repair process.
- Follow the on-screen instructions.
- Examine QuickBooks after a system restart.
Step 3: Check Folder Permissions
- Open the folder that contains your QuickBooks company file.
- Right-click the folder and select Properties.
- Click Security > Edit.
- Make sure everyone has Full Control.
- Click Apply > OK and restart QuickBooks.
Step 4: Reinstall QuickBooks Database Server Manager
- Uninstall the QuickBooks Database Server Manager from the control panel.
- Get the latest version from Intuit and download it.
- Install and configure the server manager.
- Restart your system and then test if this issue is still existing or not.
Conclusion
Database connectivity or multi-user access issues are connected with the causes of QuickBooks Error H202 and QuickBooks 505 error. The above solutions can prove to be beneficial in making the users able to eliminate both problems as well as ensuring trouble-free performance from QuickBooks. To get more help, consider calling QuickBooks Support or an IT specialist if the issue persists.