
QuickBooks error 6000, 83 often occurs due to issues with file access, server configurations, or file corruption. Common causes include using an incorrect version of Windows, improper file extensions, or incomplete QuickBooks installations. In some cases, access restrictions to QuickBooks services or network servers can trigger this error. The company file may also become damaged, especially if stored in a corrupted shared folder or when multiple systems are attempting to host the file. Additionally, QuickBooks may display error 6000,83 when you attempt to convert a company file from an older version or configure server hosting incorrectly.
This article will provide a comprehensive guide to identifying and troubleshooting QuickBooks error 6000, 83. It covers various scenarios, such as when creating or restoring backups, as well as when storing company files on a Windows or Linux server. The step-by-step instructions are explained in detail for resolving errors 6000 and 83 in QuickBooks Desktop including using QuickBooks File Doctor, checking file names, managing server settings, and even manually repairing the issue. Each situation is addressed with clear solutions to help users effectively fix the error and restore their QuickBooks functionality.
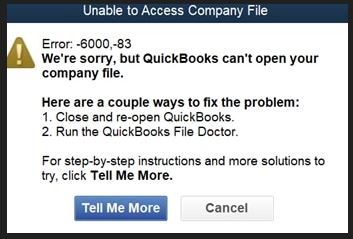
error code 6000 83
An error occurred when QuickBooks tried to access the company file.
Steps for Troubleshooting QuickBooks Error 6000, 83
Here are the steps to fix the QuickBooks error 6000, 83. We have mentioned the stages when you are likely to experience this issue and the troubleshooting steps to fix them.
Situation 1: When Creating a Backup of Company File
Shut down QuickBooks Desktop on the computer serving as your company file host. Navigate to the File menu and choose QuickBooks Desktop Quit.
- Launch the Start menu in Windows.
- Open File Explorer by typing File Explorer into the search bar.
- Click on My Computer in the sidebar. This is often referred to as This PC.
- Choose your C: drive and open it.
- To create a new file folder, right-click on the screen, choose New, and then Folder. Name it something uncomplicated, like QB Test Folder.
- To build a backup company file, follow these instructions. The folder you just created on your C: disk is where you should place the backup when QuickBooks asks where to save it.
- Utilizing the fresh backup, follow the instructions to restore your corporate file.
As soon as QuickBooks error 6000 XXXX disappears, switch to using your backup file as your primary company file. Delete your outdated corporate file. To avoid using it by accident, we advise renaming it.
Situation 2: When Restoring Company File
Solution 1: Check your backup filename
Verify that the filename or folder containing your backup company is free of symbols, special characters, or spaces. Here is an instance of a file name that requires changes: My Business $.Business-.qbb
- Launch the Start menu in Windows.
- Open File Explorer by typing File Explorer into the search bar.
- Locate and open the folder containing your firm file backup.
- Open the file with a right-click. Add QBB to the file name, then choose Rename. This is your corporate backup file, sometimes referred to as a QBB file.
- Take out any spaces, symbols, or special characters from the filename.
- Rename can be chosen by right-clicking the folder containing the QBB file. Eliminate any spaces, special characters, or symbols.
- You can recover your company file by following the procedures.
Solution 2: Prepare a portable company file
In case you are unable to restore your QBB file, return to the company file from which you made the backup and open it.
- Comply with the instructions to create a QBM or portable corporate file.
- To restore your company file, use the portable company file.
Solution 3: From your local hard drive, restore the backup
Transfer your firm file backup to a local hard drive if it is presently stored on your server. Usually, this is your C: drive. Next, adhere to the instructions to recover your corporate file. You can return your company file to your server once the error has been fixed.
- Proceed to the section for your server setup (Windows or Linux) and follow the instructions.
Related Topic: Quickbooks Error 6000, 832
Situation 3: If Company File on a Windows Server
Solution 1: Turn off hosting on the workstations
On your workstations, make sure that the Host Multi-User Access option is disabled if you are hosting your company data over a network. These are network-connected PCs that don’t store your company’s files. The only machine hosting should be your server.
- On one of your workstations, launch QuickBooks.
- Keep your corporate file closed. Alternatively, pick Utilities from the File menu and hover over it.
- Don’t choose the Host Multi-User Access option if it appears. Proceed to the next workstation. The issue isn’t being caused by this one.
- Choose the option to Stop Hosting Multi-User Access if it is available.
- On each workstation, follow these instructions again.
Solution 2: Use QuickBooks File Doctor
First, you need to download the File Doctor and access it to scan your particular company file. Let it resolve any problem it finds.
Solution 3: Restore from a backup
Use your backup file to restore your company file if you have one. Go on to Solution 4 if you don’t have one.
Solution 4: In case of File Doctor fails, fix QuickBooks error 6000, 83 manually
In case you fail to use File Doctor, or still witness the issue after using it, it will be possible to repair it manually.
1st Step: Set up Windows to share your company files
- Update QuickBooks Desktop to the most recent version.
- Verify that QuickBooks Desktop can operate on your network. Check the internet settings and firewall of your server computer and workstation.
- Set folder permissions to allow sharing of the folder containing your company files. This folder is generally called QuickBooks.
2nd Step: Scan the folder that has your company files
- Install QuickBooks Database Server Manager on your server PC if you haven’t previously.
- On the server computer, select Windows from the Start menu.
- Open QuickBooks Database Server Manager by typing Database Server into the search bar.
- To scan the folder containing your firm files, follow the instructions.
- Once finished, select the Windows Start menu. Open File Explorer by typing File Explorer into the search bar.
- Locate the directories that you just scanned.
- Verify that the folder contains an ND file. This is how it appears: [your company file]qbw.nd.
- Repeatedly scan the folder if it’s not visible.
- Launch the QuickBooks file for your firm. If you can work with your company file, then everything is fixed.
3rd Step: Review your hosting settings
- On your workstations, Database Server Manager has the ability to occasionally reset the hosting settings. Once your folders have been scanned, proceed as directed in Solution 1: Turn off hosting on your workstations.
- Launch the QuickBooks file for your firm. If all functions properly, the error has been fixed.
4th Step: Reset Database Server Manager
Proceed with the steps mentioned in the Configure Server Manager section of the particular Database Server Manager article. When it is finished, open your company file.
5th Step: Shift your company file
Shifting your company file will resolve any problem with its location.
- Launch the Start menu in Windows.
- Locate the folder containing your corporate file by opening File Explorer.
- Find the file for your company. This is how it ought to appear: [your company name].QBW.
- Choose Copy with a right-click on your corporate file.
- On your Windows desktop, right-click on an empty area and choose Paste. Your company file is now in copy form.
Important: You might be prompted by QuickBooks to recreate your company file. If so, adhere to the instructions displayed on the screen.- Launch the desktop version of QuickBooks.
- After choosing Open or restore an existing company, open any particular company file.
- Look for the company file that you copied to the Windows desktop by browsing through your PC.
If the duplicated business file opens properly, the file location is the issue. Place the duplicated company file back in its original location.
- Shut down QuickBooks Desktop. Navigate to the File menu and choose QuickBooks Desktop Quit.
- Right-click the duplicated company file and select the Rename option. To make it easier to recognize, include the word Updated in the filename.
- Open the original company file folder.
- Choose Rename when you right-click on the original company file. Include Old in the filename.
- From your Windows desktop, drag the company file that you copied to the open folder.
- Launch the desktop version of QuickBooks.
- After choosing Open or restore an existing company, open the accompanying file.
- Locate and launch the duplicated company file. You’ll use the copied company file from now on.
Solution 5: Edit your Windows host file
You can test your network to check whether it’s the source of the error if you’re still having problems. To edit your Windows host file, go to one of your workstations and follow the instructions.
Situation 4: When the company file is on a Linux server
Make sure you have the necessary rights to make changes to the server before you begin. Seek the assistance of an IT specialist if required.
1st Step: Linux Server Configuration
- On your server, launch Linux Database Server Manager.
- Configure the directory in the Initord.conf file and Database Server Manager by following the procedures.
- Restart the host machines running QuickBooks Enterprise.
- Everything should be fixed if you can access your corporate file. Proceed to Step 2 if Error -6000, -83 is still displayed.
2nd Step: Host File configuration
First, you need to ping the server to acquire the IP address and server name:
- Launch the Windows Start menu on one of the network-connected PCs.
- Open Command by typing CMD into the search bar.
- In the window, type Ping [Name of your Linux server] and press Enter.
- Note down the IP address and server name.
Edit the host files after that. Verify that the IP address and Linux server name on every machine that is connected to your server are right. Start with the system displaying Error -6000, -83.
- Shut off QuickBooks on every machine linked to your network. Navigate to the File menu and choose QuickBooks Desktop Quit.
- Launch the Start menu in Windows.
- Open File Explorer by typing File Explorer into the search bar.
- Click on My Computer in the sidebar. This is often referred to as This PC.
- Access the C: drive. Next, access the Windows folder.
- Locate the folder named System32. First, open the ETC folder, then the Drivers folder.
- Select the C:\Windows\System32\drivers\etc\hosts file with a right-click. Choose Notepad as the Open with option.
- Locate the file’s bottom. Finish the text by adding the IP address of the Linux server. Next, enter the name of your Linux server by pressing the Tab key. Note: Case matters affect files on Linux systems.
- Ensure that you enter names in the proper case.
- After choosing File, click Save. After that, exit Notepad.
- Launch your company file in QuickBooks Desktop. You can fix everything if you can.
Causes of QuickBooks Error Code 6000,83
Examine the following causes of QuickBooks error 6000, 83 appearing:
- It’s the wrong file extension.
- Whenever your QuickBooks installation is not completed.
- Inadequate access to QBDataServiceUserXX, Windows administrators, or the network server.
- A corporation (.qbw) file gets damaged.
- Damaged or corrupted shared folder or QB business file.
- If several systems try to host the QuickBooks company file.
- When attempting a network-based QuickBooks company file conversion from an older version.
- There’s a chance the file extension is in the.qbmor.qbw.adr format.
- Instead of just the server, hosting is enabled on both servers and at least one workstation (incorrect).
Conclusion
Various issues, including file corruption, network configuration problems, or improper hosting settings, can cause QuickBooks error 6000, 83 However, with the right troubleshooting steps, most users can resolve the error and restore their QuickBooks functionality.
Frequently Asked Questions
You are facing errors 6000, 83 while using QuickBooks because of issues like incorrect file extensions, incomplete QuickBooks installation, or improper file access permissions. This error can also arise from network server configuration problems, damaged company files, or when multiple systems attempt to host a company file.
To resolve error 6000,83 while creating a backup, you will have to move the company file to your local hard disk. After this, you must follow the instructions to create a new backup in a simple folder on the C: drive. After fixing error 6000 and 83, restore your company file and delete the outdated version to prevent accidental use. Lastly, you can check your server settings to troubleshoot further, if you are still encountering the error.
You must ensure your backup filename doesn’t include special characters, spaces, or symbols if the errors 6000, 83 appear even after restoration. After this, you must rename the backup file accordingly. As a final resolution, you will have to try creating a portable company file (QBM) or restore the file from a local hard drive if the issue persists.
You can fix QuickBooks error code 6000, 83 on a Windows server by disabling hosting on all workstations except the server. If the error persists, use QuickBooks File Doctor to scan and fix the company file. As a last resort, manually check folder permissions, scan company file folders with QuickBooks Database Server Manager, and adjust hosting settings on all affected machines.
To resolve QuickBooks error 6000, 83 when using a Linux server, you will have to ensure proper configuration of the Linux Database Server Manager and server directories. If Error 6000,83 continues, ping the server to get its IP address, and edit the Windows host file on each workstation to ensure correct IP and server name entries. After saving the changes, you will have to restart QuickBooks and try opening the company file again.
Several recommended practices can reduce the likelihood of running into QuickBooks problem 6000 83, even if there is no guaranteed solution to stop the problem from happening. Frequently backing up QuickBooks company files, making sure all network connections are steady and safe, adjusting folder permissions appropriately, avoiding using unusual characters in file names, and maintaining QuickBooks and antivirus software up to date are a few of these.